ROCHESTER - WordPress Theme
Introduction
Thank You For Purchasing One of Our Theme!
You will get answers for all your questions regarding our theme from this documentation and it provide you with clearer details that you need to know to use Rochester Theme. Still not get any answers for your questions, please contact us through Support Forum or directly in themeforest account.
Wordpress Information
If you are new to WordPress, there is a step-by-step plan for getting started. Plenty of options for assistance are listed in this article. If you need help installing WordPress, below are all the useful links for WordPress information.
- WordPress Codex – You can find the General information about WordPress and how to install wordpress on your server.
- First Steps With WordPress – You can find the steps to make your new site your own.
- FAQ New To WordPress – You can find the top results for the WordPress.
Server Requirements
You need some requirements to install and use the Rochester theme.
- WordPress Latest Version
- PHP 5.4
- mysql 5
PHP Configuration limits
Issues you may encounter, such as demo content fails when importing and similar issues, are generally related to excessively low PHP configuration limit settings. You can either increase these limits on your own, or contact your web host and ask to have the limits increased to the following minimums:
- max_execution_time 120
- memory_limit 64M
- post_max_size 32M
- upload_max_filesize 32M
- max_input_vars 3000
What’s Included
After you have purchased our theme from ThemeForest, you first need to download the Rochester files from your ThemeForest account. Navigate to your ThemeForest downloads tab and find Rochester. Clicking the download button displays two options. The All Files & Documentation contains everything, and the Installable WordPress File Only downloads the WordPress theme file. Below is a listing of what is included in the main files download, and a brief description of each item.
- rochester.zip – Contains the Rochester WordPress theme.
- Offline Documentation
Installation
Wordpress Installation
If you already installed the wordpress, you must check your wp installation. Choose random prefix, for example [random_demo] for your tables to avoid over-writing any existing database tables and also for the security purpose. Also while creating Username and Password, avoid the username and password as admin and admin. Set the username and password randomly. If you are freshly installing the wordpress follow the above steps.
Theme Installation
When you download the theme from Themeforest, you will get an archive file in .zip extension. You need to unzip that archive file. The rochester.zip file is the Installable WordPress Theme and what you need to use to get the theme installed. Please see the following steps that how to install Rochester.
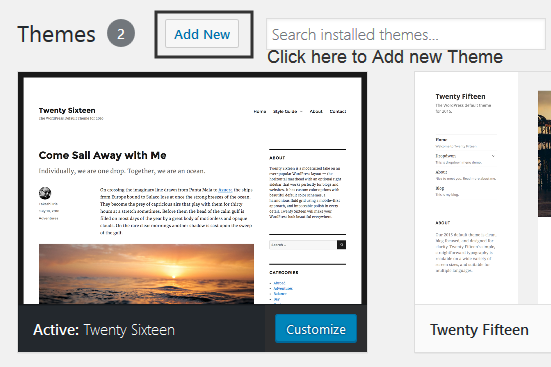
- Login to your WordPress Dashboard
- Navigate to Appearance > Themes
- Click Add New button located at the top of the screen or Add new theme.
- Click on Upload Theme button at the top of the screen.
- Navigate the rochester.zip file on your computer and click Install Now.
- Activate the theme after it is completely uploaded.
After activating the theme a notice should appear on the top of the screen, click on begin installing plugin and install the Plugins given in this theme.
Upload Theme

Browse Theme

Active Uploaded Theme

FTP Installation
If you are going to install the theme using FTP, you will need an FTP Client, such as FlashFXP. After unzip the rochester.zip file, you should see Rochester Folder and follow the steps below to install the theme via FTP:
- Log into your hosting space via an FTP software.[such as FlashFXP.]
- Unzip the rochester.zip file and find rochester theme folder.
- Upload the rochester folder to your server in path wp-content > themes.
- The uploaded path should be like this: > wp-content > themes > rochester
- Activate the newly installed theme by going to Appearance > Themes and clicking the Activate button.
- Once you activate Rochester, you will then see a notification message to install and activate the plugins
- In the notification message, click the Begin installing plugins to install the Plugins given in this theme.
- Currently Template Core and Visual Composer are required plugins that is needed to use in Rochester.
- You can activate, deactivate or update the plugins from this tab.
- Then hit the Install button on each plugin to start installing them.
- After you’ve installed them, an Activate button will appear which you can click to start activating them.


Plugin Installation
Rochester includes 4 plugins that will need to be installed and activated: Revolution Slider, Visual Composer, Template Core, Rochester Importer. Template Core plugin is required for the theme to work as it contains all theme's basic functionality. Revolution Slider is recommended plugins. Visual Composer and Template Core are required plugins. When you install Rochester, you will get a notification message in your WP admin telling you of the required and recommended plugins.
- Revolution Slider
- Blogger Importer
- Visual Composer
- Template Core
- Rochester Importer
- The Events Calendar
- Wordpress Importer


Demo
Import Demo Content
Check below to import demo content with our theme. We have also include the exported XML file from our demo, this allows you to quickly set up your theme. The XML file will give you all of our demo pages.
- Login to your WordPress Dashboard
- Install and activate these plugins before you proceed: Visual Composer, Template Core, Rochester Importer, Charitable, The Events Calendar
- Navigate to Appearance > Import Demo Data tab in your admin sidebar.
- Installing a demo provides pages, posts, images, theme options, widgets and more.
- Click Import Demo Data to install the demos.
- It can take a few minutes to import everything. Please be patient to import completely.
- After install, you can see a message to Regenerate Thumbnails. Click the link and Install button to install the plugin. Then choose to activate the plugin.
- Then go to Tools > Regenerate Thumbnails, and choose to Regenerate All Thumbnails. It can take a few minutes to regenerate based on the server speed.
NOTE – The last two steps is not required, because it simply regenerates demo images into the appropriate sizes for various areas. If you replace our images with your own, this steps can be skipped.


Manual Demo Import
Before do manual import you need to check the following plugins are installed
- Visual Composer
- Template Core
- Charitable
- The Events Calendar
To import demo manually, you can get XML file with this documentation folder named as "Extras" and file name "content.xml". To import "content.xml", please install "Wordpress Importer" plugin.
- Go to Tools > Import. Then click on WordPress at the bottom of the page.
- A window should appear click the Install now button.
- Click Activate plugin & Run Importer.
- Then choose the content.xml file and click upload file and import.
- It can take a few minutes to import everything. Please be patient to import completely.


Import Theme Options
After you import the demo content, need to import theme options. The file for import is located in same folder named as "theme_options.json".
- Navigate to "Theme Options > Import / Export"
- Click on "Import Options > Import from file"
- Choose "theme_options.json" file and click "Import" button.

Import Widgets
After you import with theme options, need to import widgets. The file for import is located in same folder named as "widgets.wie".
- Navigate to "Plugins > Add New"
- In "Search Plugins" box add "Widget Importer & Exporter" and search it.
- Choose "Widget Importer & Exporter" plugin, Click Install and then Activate it.
- Navigate to "Tools > Widget Import/Export" and import the file "widgets.wie"
- It can take a few minutes to import widgets. Please be patient to import completely.


Import Sliders
Our theme includes the premium plugin - Revolution Slider. Once you’ve installed and activated the Revolution Slider plugin, menu item will be appear at the bottom of the WordPress menu. The file for import is attached with this documentation folder named as "Extras > Sliders" and file name will be "slider_one.zip" or "slider1.zip".
- Navigate to Revolution Slider in admin sidebar.
- Click on Import Slider button
- A popup window will appear and Click Browse button and choose slider zip file
- Then click Import button.


Theme Options
Advanced Theme Options Panel
Our theme options panel will give you full control over your website, and enable you to customize more features on it. To access the Theme Options panel, go to "Appearance > Theme Options" in your WordPress admin.
Theme Options control the global settings for the entire website, unless otherwise specified in Page Options.
- General Options – In General options, you can enable or disable Page Loader, Responsive Design and also Custom CSS Code to add your custom styles for site without touching theme styles.
- API Keys – Mailchimp API key to enable Mailchimp feature and add Google Map API Key to use google maps.
- Header Options – Here you can choose Header Type, Header skin, Header transparency, Sticky header and enable or disable Header elements.
- Logo Options – In Logo options, you can upload logo based on header skin or add logo as text with font styles.
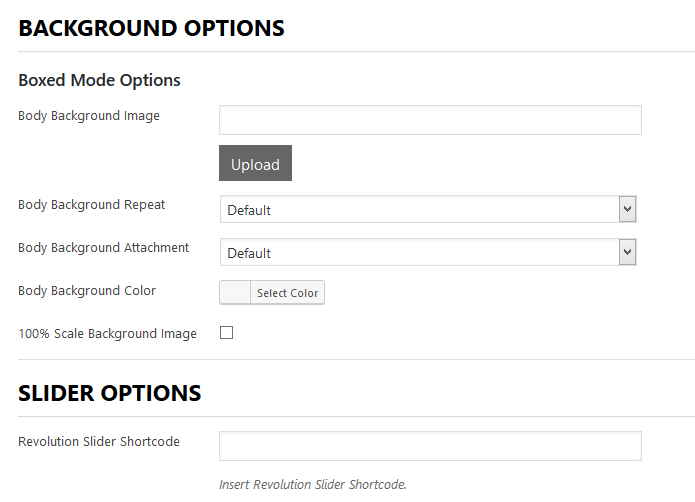
- Background Options – In Background options, you can set background and padding for header.
- Menu Options – In Menu options, you can choose menu type and dropdown menu settings.
- Layout Options – In Layout options, you can choose the theme layout, page layout and select the maximum width for fullwidth and boxed layout.
- Footer Options – Here you can choose footer style, footer widget areas, enable/disbale footer menu and customize copyright text.
- Background Options – In Background options, you can set background and padding for footer.
- Skin Options – Here you can choose the default color schemes, custom theme color and set the colors for the header top bar background, sticky header background, menu, sub menu and link colors.
- Background Options – These options allow you to customize body background and page backgrounds.
- Typography – Typography options allow you to select and customize google fonts for your body, headings, menus, page header, posts and widgets.
- Social Icons – This allows you to choose the social icon type and add links to your social networks.
- Blog Options – These options allow you to customize archive layout, blog layout, single posts layout, gallery post slider settings, enable/disable post meta, excerpt length, pagination/infinite scroll and date format.
- Social Sharing – These options allow you to choose types of social sharing networks to blog posts for your site.
- Import / Export – These options allow you to import and export data from file or URL.
General Options

Footer Options

Social Icons

Header Options

Background Options

Blog Options

Menu Options

Styling Options

Social Sharing Options

Layout Options

Typography Options

Backup Options
Page Options
Advanced Page Options Panel
You will find Page Options inside every page, post, portfolio, team, testimonials, clients and product single page. Page Options can be used to override the Theme Options for single page diversification.
Page
- General Options – In General options, you can choose the page layout, and column layouts.
- Header Options – In Header options allows you to choose header type, skin and transparency.
- Footer Options – In Footer options allows you to choose footer styles, enable/disbale footer widget area and choose custom footer menu for this page.
- Page Options – These options allows you to enable/disable the page title bar and customize background options. Also you can optionally show blocks in bottom of page by choosing in "Additional Content Block". Blocks need to add in "Blocks" post type.
- Sidebar Options – Here you can select the dynamic sidebar for the page.
- Background Options – This allows you to choose body background options for the current page. This will override theme options background settings.
- Slider Options – These options allow you to add shortcode for Revolution Slider.
- Parallax Sections – These options allows you to customize current page to one page section.


Post
- General Options – In General options, you can choose the post layout, and column layouts.
- Header Options – In Header options allows you to choose header transparency.
- Page Title Bar Options – These options allows you to enable/disable the page title bar and customize background options.
- Sidebar Options – Here you can select the dynamic sidebar for the page.
- Post Options – These options allow you to add video embed code, audio embed code and external URL for post formats. Also you can optionally show blocks in bottom of page by choosing in "Additional Content Block". Blocks need to add in "Blocks" post type.
- Timeline Icon – This allows you to choose Icon for posts that will be displayed on Timeline Style.
- Background Options – This allows you to choose body background options for the current page. This will override theme options background settings.


Portfolio
- Portfolio Options – These options allow you to add client name and portfolio date.
- Page Options – These options allows you to enable/disable the page title bar and customize background options. Also you can optionally show blocks in bottom of page by choosing in "Additional Content Block". Blocks need to add in "Blocks" post type.

Team Member
- Team Member Options – These options allow you to add member designation, phone number, email address, hobby, experience and short description.
- Social Links – These options allows you to add social profile links of team member.
- Page Options – These options allows you to enable/disable the page title bar and customize background options.
- Content on Bottom - These options allows you to add content blocks in bottom of page by choosing in "Additional Content Block". Blocks need to add in "Blocks" post type.


Testimonials
- Author Info – These options allow you to add special text, company name and company URL.

Menu
Setting Up The Menu
For the menu settings, Rochester supports custom WordPress menus, with multiple levels of dropdown. You can assign a menu in 3 areas Primary Menu, Top Menu and Footer Menu. These menu locations can have a custom menu assigned. Once a menu is created and assigned to the location, it will show up on the site.
Setup New Menu
- To setup new menu, Navigate to Appearance > Menus section of your admin sidebar.
- Click the Create A New Menu link and enter the name then click the Create Menu button.
- To add a custom menu item, enter a custom name and link into the Links box.
- You can use drag and drop functionality to manage your menus.
- To Create a dropdown menu, you can simply drag a menu item below and slightly to the right of another menu item, and it will be under a main menu and create a dropdown section.
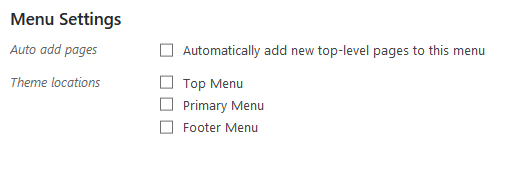
- Once you setting up your menu, assign the menu to any one of the 3 locations which is shown at the bottom of the page in the Menu Settings.
- After setting up the menu, click the Save Button.

Setup Mega Menu
Rochester has a mega menu that can be enabled under the main menu. You can set 1-4 columns and having custom column width settings. You can set icons/images next to menu items and more. Please follow the steps that how to set the mega menu.
- Navigate to Appearance > Menus section of your admin sidebar.
- Click the Create a New Menu link to create a new menu, or choose the Select a menu to edit option that you already have an menu.
- Enabling Mega Menus are available only for top level menu item.
- Click the Arrow icon next to any First Parent Level menu item. Then click Enable Mega Menu option.
- Set the number of columns to display the columns for the mega menu.
- Menu item have a glyphicons Ex: glyphicon-search, and font awesome icon, use fa- in the name. Ex: fa-times.
- After set up Mega Menu, assign the menu to the Primary Menu in the Theme Locations at the bottom of the page and click Save button.

Home Page
Setup Home Page
You can build any type of home page using our shortcode elements. Home page setup is the same as setting other regular pages. You need to set your Main Home Page in Settings options which page will be your Main Home Page.
- Navigate to Settings > Reading tab.
- Select A Static Page option.
- Choose the page you want to set as your Home Page from the Front Page dropdown list.
- You can set the Blog Page as the Posts Page from the Post Page dropdown list.

Page Templates
Rochester includes following page templates and you will need to choose the page template that suits your for your sites. This is done in the Page Section of your WordPress admin.
- Default Template – This is the Default page template that automatically has the sidebar with it. Choose this template for your blog.
- Fullwidth Template – This is the fullwidth page template. This allows your content to go 100% of the browser width.
- Parallax Template – The Parallax Template is an Onepage template. The each section in onepage having the parallax settings and options.
Shortcodes
Visual Composer Shortcodes
Rochester theme have additional 24 Shortcodes for Visual Composer with more customization options. The list of Visual Composer shortcodes are following.
- Blockquote
- Blog
- Call To Action
- Contact Form
- Contact Info
- Content Carousel Slider
- Counters Block
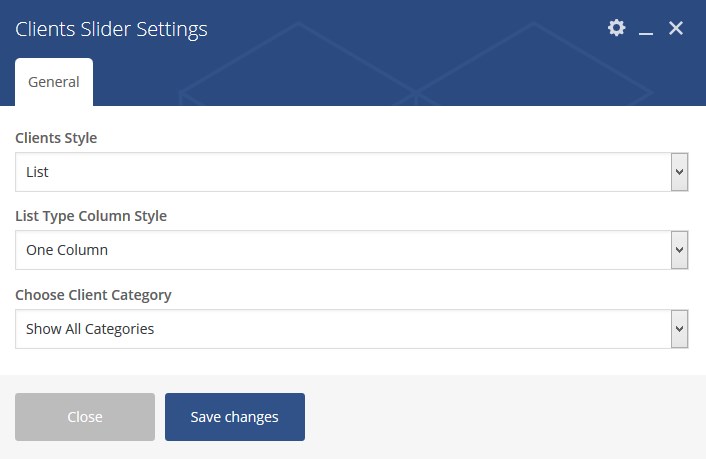
- Client Slider
- Day Counter
- Feature Box
- Google Map
- Latest post
- List Block
- Mailchimp Form
- Portfolio Grid
- Product Grid
- Product Deal
- Pricing Table
- Project
- Section Title
- Team Grid/Slider
- Testimonial Slider
- Timeline
- Video Block

Blockquote

Blog

Product Grid

Call To action

Client Slider
Contact Form

Contact Info

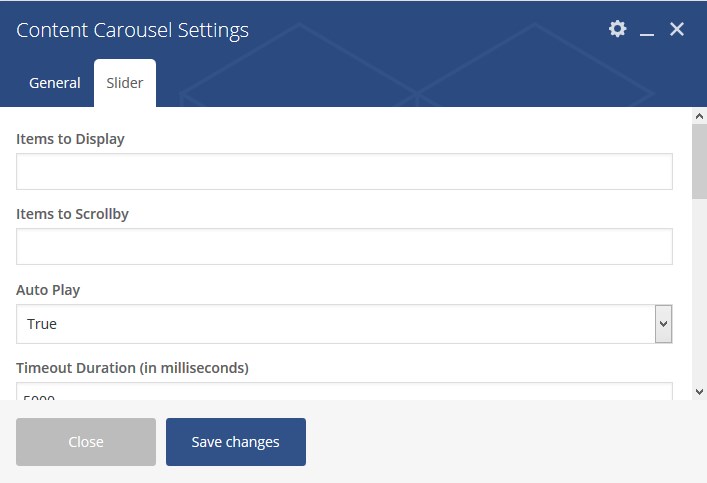
Content Carousel Slider
Counters Block

Day Counter

Product deal

Timeline

Feature Box

Google Map

Latest Posts

List Block

Mailchimp Form

Portfolio

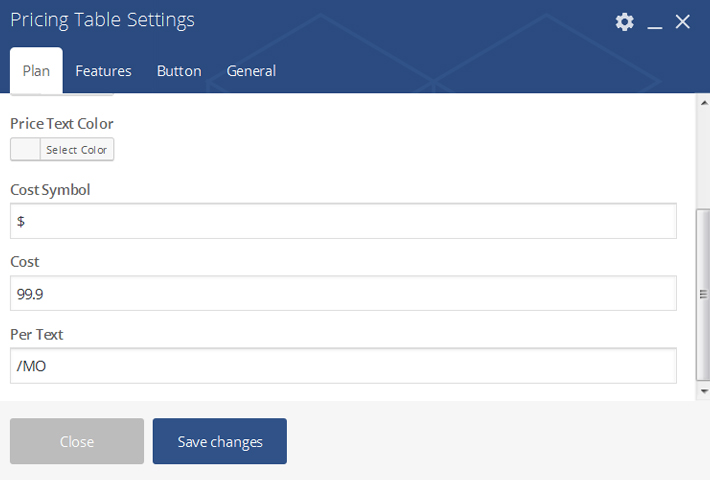
Pricing Table
Project

Section Title

Team Grid/Slider

Testimonial Slider

Video
